Categories
Apps Featured Info

Bad News Stalkers: WhatsApp Blocking Screenshots On View Once Messages

Key Highlights

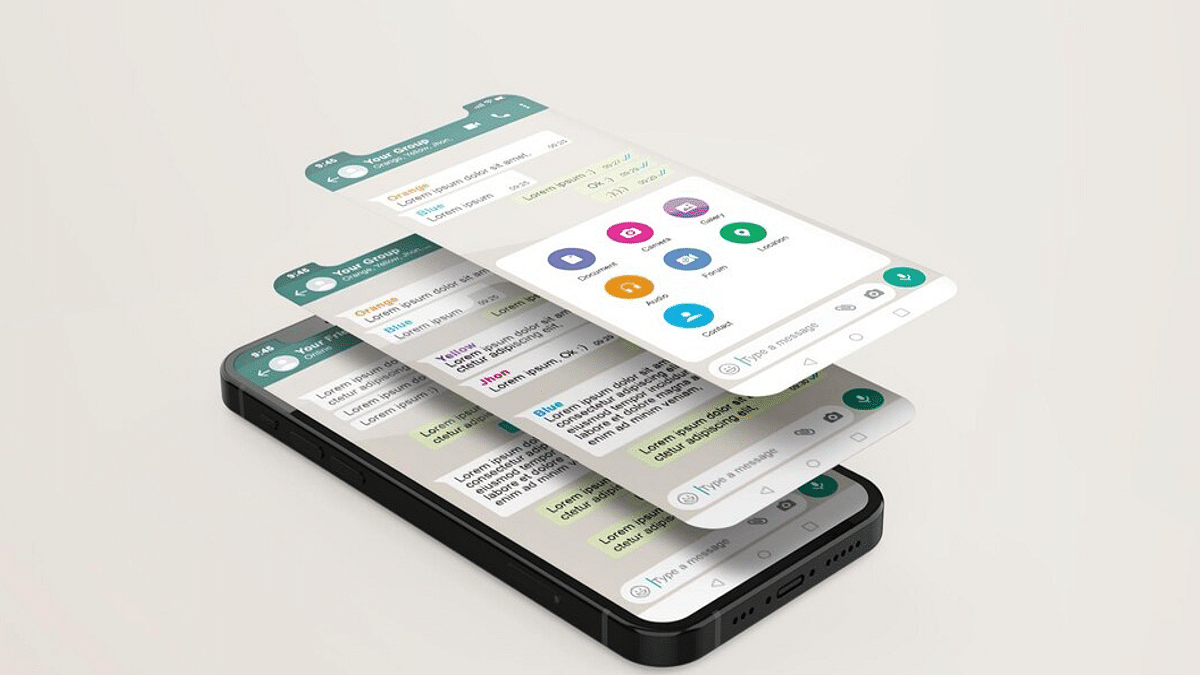
  • WhatsApp enabling screenshot blocking for View Once messages
  • The platform lets you leave the group silently
  • It will let you choose who can see that you’re active

WhatsApp never fails to impress its users, particularly with its privacy features. This time, the social media site owned by Meta has added a few more privacy measures.

A new feature that prevents users from taking screenshots of ‘View Once Messages’ is being rolled out by the platform. The fundamental goal of this is to provide more privacy and security while also retaining users on the site.

‘View once messages,’ which self-destruct once the recipient views them, have been introduced by WhatsApp. Users are able to send photographs, videos, and other messages, simply once. The message automatically vanishes after the recipient has read it. Because they could still capture screenshots of messages that were disappearing, some users nevertheless believe the feature to be useless.

In addition to blocking screenshots, WhatsApp is now testing the option to control who can see your online status. You can now select who can see your activity, enabling you to log into the app anonymously without anyone else knowing. Users can pick between contacts, everyone, or nobody using this recently discovered feature. Additionally, you have the option of selecting a blacklist of contacts from which to hide your status.

To add to that, Meta founder and CEO Mark Zuckerberg announced new privacy features that allow users to exit a group conversation secretly and choose who can see their online presence.

Users will be able to leave a group in private without having to inform everyone thanks to the silent leaving of group function. This feature has begun to roll out to all users and will progressively become available to all users this month. Only the admins will be notified when a member leaves the group. This will make it much simpler to end conversations without running the risk of receiving too many inquiries from other people.

Categories
Apps Featured How To

Paytm Live Train Running Status Feature Released; How To Check Train Status Using Paytm App

India has become a large market for UPI and digital wallet apps. The trend surged with the demonetization of old currency in the country and the call for digitization by the Indian government. Paytm, Mobikwik, and others have been amongst the first in the lot of UPI apps in the country. Paytm is one of the most rapidly expanding UPI apps with the company adding new features and services frequently. In the latest development, Paytm has made it easy for its users to check the live running status of their train. This new travel service is beneficial for users who wish to plan their journey as per the available schedule.

The Paytm Live train running status will now be available alongside the PNR train status which has been released already on the platform. The latest travel service on the Paytm app has been announced for both Android and iOS mobile versions. If you have a journey planned or are already on one of the trains bound for a long destination, you can easily check the live status to get updates on your arrival time.

However, in order to use the train live running status, you need to make sure the Paytm app installed on your respective phones is updated to the latest version. Update your app, if it isn’t the latest version only then proceed with the remaining procedure. This is your step-by-step guide to check the live running status of any train on the Paytm app. Take a look:

How Can You Use Paytm Live Train Running Status Feature

Step 1: Launch the Paytm application. These steps can be performed on both Apple iPhone and Android smartphones.

Step 2: Either go to the services and select Train services, or directly type the Train Status in the search bar.

Step 3: Once the Travel services page open up, you will get several other options including bus flights, and others. Select Trains.

Step 4: Another fresh tab will open up with PNR Status, Train Calendar, and Train Status options.

Step 5: You need to click on the Train Status tab.

Step 6: You will now get the option to enter the Train name or number. Once you feed in the details, you will see the name of the name in the list. Select it.

Step 7: Now, select the boarding station from where you wish to get the details. Make sure the boarding date is correct. Make the required modifications in case of any mismatch.

Step 8: Click on the Check Live Status tab.

Step 9: As soon as you perform Step 8, you will see the train running status live on the app’s screen.

Categories
Apps Featured How To

iOS Tips And Tricks: How To Set Up And Use Sleep Schedule On iPhone

With the release of iOS 14, Apple added the feature to set up sleep routines in the Health app. You can use the feature to determine how many hours of sleep you should get each night and then plan your wake-up time accordingly. Although this feature is widely accessible, few people are aware of it. Nonetheless, once you start using it, there is no turning back.

Through the Clock app, you can set up a one-time alarm that wakes you up every day. The main benefit of choosing a sleep schedule feature is that it enables users to set clear objectives and monitor their sleeping patterns.

In this post, we will take a look at how we can turn on and use the Sleep Schedule feature on iOS. But before we start, note that the feature will only work on iOS 14 and above.

How To Turn On Sleep Schedule On Your iPhone?

Step 1: On your iPhone, navigate to the ‘Health’ app.

Step 2: Click on the ‘Browse’ tab at the bottom right of the screen.

Step 3: Now, scroll down till you see the ‘Sleep’ option and click on it.

Step 4: Then, you will see the option ‘Set Up Sleep’, below that tap the blue ‘Get Started’ button. Hit Next on the following information screen.

Step 5: To set your desired sleep time in hours and minutes, use the ‘+’ and ‘–‘ buttons. Then tap Next.

Step 6: Now, set up your first sleep schedule. You can also set multiple schedules according to your sleep patterns. Click on the day symbols to add or subtract them from your initial schedule.

Step 7: Here, you can easily schedule your bedtime and wake-up time. You can press and hold the scroll wheel to set the desired time. The number of sleep hours is displayed according to the set timing. If your times don’t match up with the Sleep Goal you set at Step 5, the dial will turn yellow.

Step 8: After setting the time, scroll down to find the ‘Alarm’ option. Under that, you can set a wake-up alarm if you want. You can also set the alarm sound and vibration pattern and enable or disable the snooze option.

Step 9: Tap ‘Done’ once you are finished with the process. That’s all.

By following these simple steps, you can easily plan your sleep cycle on your Apple iPhone. This feature helps you stay disciplined by notifying you 30 minutes before bedtime. This allows you to interrupt whatever you’re doing and prioritize sleep.

Categories
Apps Featured How To Tech Gadgets

Telegram Tips And Tricks: How To Schedule Messages On Telegram Android, iOS App

While WhatsApp is one of the most preferred instant messaging applications for Android and iOS ecosystems, Telegram has gradually established itself as one of WhatsApp’s prime rivals. Telegram also operates on the same end-to-end encryption system so that privacy is never compromised. Telegram also offers a plethora of features to enhance the messaging experience. You get to make both voice and video calls as well on Telegram which is as private as text messages.

Amongst the several useful features offered by Telegram is the option to schedule any text message. You can set the time frame when you wish to send any of your contacts a message. This feature comes in handy when you might have to send someone a message and for some reason, you don’t have any internet connection. In such scenarios, you can pre-schedule a message using the Telegram mobile app. But how exactly you can do it? We have mentioned the steps below:

How To Schedule Any Message On Telegram

Step 1: On your respective Apple iPhone or Android, open the Telegram app. If you don’t have the app, make sure you have downloaded it from the App Store or Play Store and have registered.

Step 2: Go to the chat window or the contact to whom you wish to send the scheduled message.

Step 3: Start typing your message. Instead of a single tap on the send button, press and hold it.

Step 4: You’ll see two options including Schedule Message and Send Without sound. Select the schedule message option.

Step 5: You can now set the time frame by when you want to get the message delivered to the selected contact.  Set the date and time.

Step 6: Once you have set the preferred date and time, tap on the send message option below.

Step 7: That’s all you would need to do to schedule any message on the Telegram app.

Notably, the steps mentioned above are performed on an Android smartphone. The procedure to schedule messages on Telegram on iPhones would be the same. It is advised that you use the latest version of the Telegram app to get access to all the privacy features.

Categories
Apps Featured How To

Facebook Tips And Tricks: How To Create And Upload Facebook Reel Videos

Social media apps are witnessing an all-time high in terms of downloads and user engagement. Facebook now called Meta has been one of the oldest social media applications that is still popular amongst the masses despite Instagram and other apps grabbing the major share of this market. Meta has been adding similar features across all of its acquired social media platforms. Facebook Reels is one of such options that has been borrowed from its sister app Instagram. The short video feature is currently all hype not just with social media influencers but also with the general audience.  

Creating and uploading a Facebook reel is one sure-shot way to increase the follower count and your account’s reach; specifically, if you are one of the social media influencers. But how can you create or share a Facebook Reel using your phone? In this article, we have listed down the ways with which you can not only create but also edit a Reel and share it with your audience or friends.

How To Record Facebook Reels Videos On Your Smartphones

Step 1: Launch the Facebook application on your respective smartphones (Android or Apple iPhones).

Step 2: Go to the Home Feed.

Step 3: Click on the menu option. You will see this icon .

Step 4: Click on See more.

Step 5: You will now see the Reels icon. Tap on it.

Step 6: Now, select the create option (camera icon).

Step 7: If you are recording the reel video in dark background, you can turn on the camera flash as well using the  icon.

Step 8: You can flip the camera as per requirements (front or back) by tapping on the reverse camera icon .

Step 9: To adjust the time limit for the Reel video, you would need to click on the Length option placed on the right. You can set the timer from 15, 30, or 60 seconds.

Step 10: Now, start recording the reel and stop once done. You would need to hit the  button for the same. You can repeat this step if you wish to add more clips to your Facebook Reels video. Once done share the reek in your Feed.

Categories
Apps Info

100+ Best Instagram Names For Transgenders

Instagram has become a very fascinating social media application nowadays as it allows you to earn money, use filters, chats, and more. The influencers also get opportunities to endorse brands. In fact, people choose different and attractive names to increase or attract new users to their platform.

Apart from boys and girls, transgender also looks for attractive names and if you are one of those, then you come to the right place as we are curating the list of more than 100 names that will help you to choose the right one.

Best Instagram Names For Transgender

  • Oysters
  • Dango
  • straight
  • Abrasive
  • Recently
  • Handkerchief
  • Moyai
  • Sensible
  • Spider
  • Aerobic
  • Mother
  • Scud
  • whispered
  • joker
  • six
  • muffler
  • withdraw
  • Capricorn
  • eland
  • child
  • Edit
  • Factor
  • Repair
  • Pelvis
  • Problem
  • Bitter
  • Bollard
  • Shut
  • Confidence
  • Pride
  • Pantsuit
  • Joyful
  • Storage
  • combative
  • Chain
  • Deltoid
  • Too
  • Gradually
  • Spanish
  • Smirk
  • Fleet
  • Announcer
  • Old
  • Rafting
  • Disloyal
  • Immature
  • Ninny
  • sledder
  • sequence
  • matron
  • continued
  • hub
  • minger
  • exotic
  • orange
  • evolution
  • bulky
  • mullein
  • euphoric
  • thumbs up
  • sucker
  • reverse
  • dinner
  • damaged
  • walnuts
  • terror
  • snip
  • antler
  • pest
  • slight
  • inborn
  • craftsman
  • home plate
  • Deadeye
  • Ribbit
  • Row
  • Typical
  • Evaporate
  • Ethereal
  • Vacant
  • Scotch
  • Dominant
  • Polished
  • Democracy
  • Civil
  • Macho
  • bond
  • radiant
  • cow
  • Scented
  • Bring
  • Flutter
  • Hair
  • Unused
  • Stipulate
  • Ablaze
  • Management
  • Repel
  • Personnel
  • Gratified
  • Sugarcane
  • Slime

100 Names For Boys And Girls On Instagram

It is worth noting that we have listed the names of the best boys and girls on the Instagram. In addition, we have listed the ways to earn money from the leading social media application.

Categories
Apps Featured Info

Oppo ColorOS 13 Global Debut On August 18: Key Features To Look Out

Key Highlights

  • Oppo’s ColorOS will launch globally on August 18
  • The event will be live-streamed via Oppo’s YouTube channel
  • ColorOS 13 will be based on the new Android 13 OS

Oppo is all set to launch its next iteration of ColorOS named ‘ColorOS 13’ on August 18, 2022. This will be a global launch. The Chinese smartphone manufacturer has not yet announced a schedule for the rollout of the upcoming version of ColorOS or specified which smartphones would be compatible with the update. Here’s what to expect.

Oppo ColorOS 13 Launch Event

Oppo will host the ColorOS 13 worldwide launch event on August 13 at 4:30 PM IST, according to the ColorOS official Twitter account. The launch event will also be live-streamed on Twitter and the ColorOS YouTube channel, according to Oppo.

Oppo will be one of the first OEMs to release its newest OS based on Android 13. To give ColorOS 13 users the finest possible operating system experience, the company has been collaborating closely with Android. It incorporates the fundamental security and privacy elements of Android 13 and offers customizations akin to Google’s Material You.

The company just sent out invitations to test the first public beta of ColorOS 13. Applications were open till August 4 for Oppo Find X5, Find X5 Pro, and Find N; testers from outside of China were also welcomed.

ColorOS 13: Key Features

The new smart features in ColorOS 13 are designed to provide the optimum user experience with large displays. In order to increase productivity and efficiency, it also offers seamless interconnectivity across various devices. The OS will also get a fresh look in order to give users a concise, comfortable, and smooth Android experience.

While ColorOS 13’s full feature set is unknown, it is anticipated to include improvements to the large screen experience, seamless device connectivity, and other things. A new design is also anticipated for “a concise, comfortable, and smooth Android experience.”

Given that OnePlus’ skin is now more similar to Oppo’s skin, we can also anticipate it to have themes based on nature, an improved Always-on-Display (AOD) capability, and much more, similar to OxygenOS 13.

Oppo’s Android-based ColorOS is a highly customized, efficient, intelligent, and richly designed mobile operating system. The 67 languages supported by ColorOS, which has more than 500 million monthly active users worldwide, include English, Hindi, Thai, and Indonesian.

Categories
Apps Featured How To

WhatsApp Finally Allows Users Delete Sent Messages After Two Days: Here’s How To Do It

WhatsApp has released several privacy-oriented features for Android and iOS users in the last few years. The Meta-owned messaging platform earlier allowed its users to delete any sent message on the mobile app. However, the default time limit to delete any message until now has been up to 60 minutes. For a while, WhatsApp has been testing an extended time limit to delete any message. After all the anticipations the brand has now dished out the stable update post which you’ll be able to delete messages after two days.

WhatsApp Delete Message Gets Extended Two Days Limit

WhatsApp has shared a tweet confirming that users will now be able to delete any message that is two days old. The Meta-owned instant messaging application will now let both Android and iOS users delete sent messages which is 2 days old. If we speak of the specifics, users will be able to delete the messages even after 2 days and additional 12 hours.

Users will get the option to delete the messages within the aforementioned timeline from both a single or group chat window. Users have been requesting WhatsApp to increase the time limit to delete any message sent using the app.

Finally, this security feature is being made available for the masses. You’ll get an update notification on your respective Android and iPhones. But if you don’t receive any notification, you can also go ahead and check it manually.

How Can You Delete WhatsApp Individual And Group Chat Messages After 2 Days?

Step 1: Launch the WhatsApp application on your Android or iPhone respectively.

Step 2: Open the individual or the group chat window from where you wish to delete the message.

Step 3: Scroll to the text and then press and hold the message.

Step 4: You’ll see a set of options on the top of the app’s window. Select the delete option (bin icon).

Step 5: You’ll get three options Delete For Me, Cancel, Delete For Everyone. You have to select the Delete For Everyone option.

The steps are identical as you would have performed before the time limit to delete any text was extended.

Categories
Apps Featured How To

Book An Uber Ride Using WhatsApp: Follow These Steps

Key Highlights

  • You can book Uber ride through WhatsApp
  • Available to commuters in the Delhi-NCR region
  • Uber ride on WhatsApp is quite simple

Now, you can order an Uber ride through WhatsApp. Yes, you heard it right. The new feature, which is now available to commuters in the Delhi-NCR region, was announced by the messaging platform and the provider of cab services in Hindi and English.

With the new feature, you can easily order an Uber ride without having to download the app. It will spare you the hassle of switching between applications. Also, it will save you from the trouble of downloading the Uber app and going through all the additional time-consuming requirements like registering and scheduling a cab, car, bike, etc. Even while it seems simple, some people who try to book a cab via WhatsApp seem to find it complicated.

Also Read | Uber EV Auto Rickshaw Services Begins In Ayodhya: Full Details

In this post, we will show you how you can easily book an Uber ride on WhatsApp in a few seconds. Unlike the Uber app, where you have to open and sign in to book a ride, you can simply send pick-up and drop-off instructions using WhatsApp. Here’s how:

How To Book An Uber Ride Through WhatsApp?

Step 1: To access the Uber chatbot on WhatsApp, open the app on your mobile phone and message ‘Hi’ or ‘Hi Uber’ to the number +91 7292000002.

Step 2: Next, you will need to provide your pick-up location and drop-off location. You can also scan a QR code that appears in the chat window.

Step 3: After that, you will get the expected fare, showing you how much you need to pay for your ride.

Step 4: At last, you need to confirm the ride.

You will receive a notification on WhatsApp itself as soon as a nearby driver accepts your request. After that, you can monitor every aspect of your ride in the chat.

Also Read | Stay Safe With Uber: Here’s How To Activate Audio Recording For Your Rides

Uber assured that riders will have the same access to safety features and insurance protections as those who book rides using the Uber app. At the time of booking, they will also be informed of the driver’s information and license plate. They will be able to contact their driver via a masked number and track his/her whereabouts while driving to your pickup location.

For the tech geeks, stay updated with the latest cutting-edge gadgets in the market, exclusive tech updates, gadget reviews, and more right on your phone’s screen. Join Giznext’s WhatsApp channel and receive the industry-first tech updates.

Categories
Apps Featured How To

Damaged FASTag? Here’s How To Get Duplicate FASTag Via Paytm

Key Highlights

  • NHAI had issued guidelines for the commuters to ensure their car has a FASTag sticker
  • You can link your FASTag with Paytm and other wallets and bank accounts
  • You wouldn’t need to replace the FASTag sticker unless it’s damaged

If you own a car or any commercial vehicle in India. You must be aware of the FATag. The RFID sticker tag for toll collection for a hassle-free commute through the state and national highways in India is what we are speaking about. Introduced first in 2014, FASTags became a mandate for vehicles back in 2021 only. NHAI had issued guidelines for the commuters to ensure their car has a FASTag sticker mounted inside the windshield so that the tolls can be collected automatically via the linked UPI and bank accounts.

It’s basically a prepaid recharge system wherein you need to make sure there is sufficient balance so that the tolls can be collected on highways via integrated RFID readers at the booth. The primary goal has been to reduce the wait time and long queues at the toll booths across different state highways. You can link your FASTag with Paytm and other wallets and bank accounts and maintain a keep sufficient balance to pass through tolls swiftly.

Also Read: How To Check Metro Card Balance Offline And Online? Learn Here

In general scenarios, you wouldn’t need to replace the FASTag sticker unless it’s damaged. That can happen if unfortunately your car’s windshield breaks or the sticker peels off and can’t be used again. The only option you are left with is to place an order for a duplicate FASTag sticker. How can you do that? Read the steps here:

Also Read: Damaged HSRP Color Stickers? Here’s How To Apply For A Duplicate HSRP Sticker For Your Car

How To Get Duplicate FASTag Sticker Using Paytm?

Step 1: Open the Paytm app on your Android or Apple iPhone.

Step 2: In the search bar, type FASTag.

Step 3: You will see the list of services offered by Paytm. Scroll to the Replacement tag option.

Step 4: A new page will open where you’ll be able to see the Vehicle Registration number. Check if it’s correct.

Step 5: Click and upload the image of your RC’s front and back.

Step 6: You’ll see the amount breakup including the Tax Insurance Fee, GST on Tag Insurance Fee, and the FASTag balance. The amount is around Rs. 100 to place an order for the duplicate FASTag sticker.

Step 7: Check if the delivery address is correct. If now, make the required changes.

Step 8: Complete the payment and your order will be placed for the duplicate FASTag on Paytm. The general time period for the duplicate FASTag card delivery is around three to four days.

Also Read | Recharge Your FASTag On WhatsApp: Here’s How To Do It