Categories
Featured How To

Spot The Scam: Six Festive Season Frauds And How To Stay Protected

Key Highlights

  • Beware of fake shopping sites, prize scams during the festive season
  • Always verify UPI IDs, QR codes, apps before making payments
  • Use strong passwords, enable two-factor authentication

As the festive season in India kicks off, online shopping, travel, and digital payments rise sharply. Unfortunately, this also means that cybercriminals are getting busier, targeting unsuspecting individuals with various scams. Cybercrime losses in India skyrocketed from Rs. 69.68 crore in FY23 to a staggering Rs. 177.05 crore in FY24. Quick Heal Technologies has identified six major digital frauds that people should watch out for during these festive times. Here’s what they are and how to stay safe.

Also Read | Online Safety: Eight Essential Cybersecurity Tips For Kids

Fake Shopping Websites

Fraudsters or scammers create fake online stores. Deals that seem too good to be true are offered on those websites, particularly around festivals when people are looking for sales. While appearing authentic, these websites steal your credit card and personal information.

What To Do:

  • Always check the website URL carefully
  • Stick to known platforms and use secure payment methods like credit cards
  • Don’t click on links from random messages

Fake Banking Apps

Cybercriminals trick users into downloading fake banking apps or reward apps. They send messages saying things like, ‘Update your KYC’ or ‘Last chance to earn reward points.’ Once installed, these apps steal your personal and banking details.

What To Do:

  • Use only official app stores to download apps
  • Verify any urgent messages directly with your bank
  • Set up two-factor authentication on your bank accounts

Counterfeit IRCTC Apps

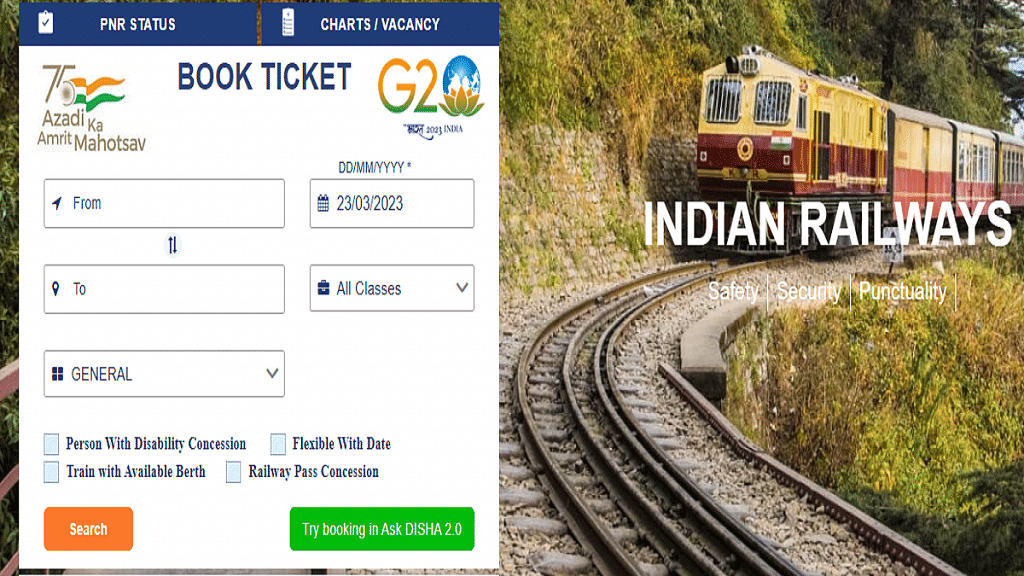
During the festive season, with many people traveling by train, scammers create fake IRCTC apps to steal sensitive data. This includes your login credentials and location.

What To Do:

  • Download the ‘IRCTC Rail Connect’ app only from trusted sources
  • Be careful with apps asking for too many permissions
  • Regularly update your phone’s security software

Fake Prize Offers

During the holidays, fraudsters send messages saying you have won a gift card or prize. This leads you to phishing sites that gets access to your personal information.

What To Do:

  • Verify such offers directly with the official brand’s customer support
  • Don’t share your personal information with unknown sources

QR Code Scams (Quishing)

Scammers use malicious QR codes on flyers or social media posts that, when scanned, take you to fake websites or download malware onto your device.

What To Do:

  • Be careful about where you scan QR codes
  • Manually enter URLs instead of relying on QR codes

UPI Scams

With UPI being a popular payment method in India, scammers create fake UPI IDs that appear to be associated with big brands. This tricks people into sending money to the wrong account.

What To Do:

  • Double-check UPI IDs before making payments
  • Be cautious about donation requests and verify the organization first

Also Read | Scammed On The Internet? Here’s How To Report Online Scams Via India’s Cyber Crime Portal

Tips To Stay Safe

  • Use strong passwords and two-factor authentication
  • Avoid using public Wi-Fi for financial transaction
  • Keep your devices and security software updated
  • Be cautious of unsolicited calls or messages requesting personal information
  • Frequently check your bank statements for fraudulent transactions
  • Stay alert and enjoy the festive season securely.

For the tech geeks, stay updated with the latest cutting-edge gadgets in the market, exclusive tech updates, gadget reviews, and more right on your phone’s screen. Join Giznext’s WhatsApp channel and receive the industry-first tech updates.

Categories
Featured How To Mobile

iPhone Users Can Finally Record Phone Calls With iOS 18: Here’s How To

Key Highlights

  • Apple has finally rolled out call recording feature for iPhone users
  • Feature available only for iOS 18 users
  • Beta update released for the same

Cupertino giant Apple is done with this year’s major launches and have finally introduced the much awaited iPhone 16 series with several upgrades and enhancements. The iOS 18 driving the new-generation iPhones brings an array of advanced features. However, the most talked about feature being added with the iOS 18 is definitely the call recording support right from the iPhone’s calling app.

For the tech geeks, stay updated with the latest cutting-edge gadgets in the market, exclusive tech updates, gadget reviews, and more right on your phone’s screen. Join Giznext’s WhatsApp channel and receive the industry-first tech update.

Also Read: Instagram Top Hacks: How To Enable or Disable Sensitive Content From Home Feed

iOS 18 Call Recording Feature For iPhone Users Explained

Apple has released the call recording option for iPhone users after all the wait. This feature is being made available to iPhones via iOS 18. The update is being released as a beta and you’ll need to update your device to iOS 18.1 beta to access and use the call recording feature. Since this update is currently in the beta state, it could take a while for the stable version to be available for the masses.

Earlier, iPhone users had to resort to a third-party app for recording outgoing or incoming calls. However, this can now be done with the phone’s native app. Not just standard call recording, iOS 18 will also provide users an AI-powered summary of the entire call. The transcription feature tags along.

Also Read: Google Messages Photomoji: What Is It? How To Use?

Steps To Record Calls In iPhone Using iOS 18

As previously mentioned, the call recording will now be a direct process with iPhones that are running on iOS 18. Using the native calling app itself, one could record ongoing calls.

Step 1: Launch the dialer app on your respective iPhone

Step 2: You need to make a call to initiate recording. You can also start recording after receiving a phone call.

Step 3: A “record” button will pop up on the top-left corner once the call starts. Tap on it.

Step 4: You will now see a notification stating “This call will be recorded”. Accept it.

Step 5: Tap on the stop recording button once done.

Categories
Featured How To Smart Watch

Amazfit T-Rex 3 Smartwatch Pre-Orders Begin In India: Here’s How To Book Yours

Key Highlights

  • Amazfit T-Rex 3 is priced at Rs. 19,999 in India
  • The smartwatch features 27days battery life, 2000nits brightness
  • It is powered by Zepp OS 4, Chat GPT 4, Zeep coach

The Amazfit T-Rex 3 has officially made its debut in India. This adventure-friendly smartwatch offers outdoor enthusiasts and fitness lovers a durable, feature-packed experience. The T-Rex 3 will be released on September 26, 2024. With pre-booking now open, here’s everything you need to know about this smartwatch. Also, learn how you can secure one for yourself.

Also Read | Urban Zippy Smartwatch Review: Your Wrist’s New BFF Or Just Another Device?

Amazfit T-Rex 3: Key Features

  • Display: It offers 1.5-inch AMOLED display along with bright 2,000nits peak brightness.
  • Military-Grade Durability: It can withstand extreme environments, including water, dust, shock, and temperature resistance.
  • Privacy Options: Flexible GPS data storage with choices for permanent, temporary, or no cloud upload. Users can also disable GPS tracking.
  • Battery: Lasts up to 27 days with typical use or up to 180 hours when using GPS for tracking long adventures like hikes or climbs.
  • Over 170 Workout Modes: The watch includes unique modes like Hyrox Race, Ultramarathon, Freediving, and an upgraded Strength Training mode.
  • AI-Powered Features: First smartwatch OS with fully integrated AI and an AI assistant powered by OpenAI’s GPT-4o technology.
  • Customizable Strength Training Mode: You can create your own training templates in the Zepp app and sync them with the watch to follow workout routines directly from your wrist.

How To Pre-book The Amazfit T-Rex 3

The Amazfit T-Rex 3 smartwatch is now available for pre-order on Amazon. Here’s a step-by-step guide on how to pre-book it:

Step 1: Go to Amazon India and search for the “Amazfit T-Rex 3” in the search bar.

Step 2: Make sure that the delivery location is correct. Currently, Amazon offers FREE delivery between September 27 till October 5. Update your location if necessary.

Step 3: Click on the “Pre-order now” button to reserve your smartwatch.

Step 4: Choose your payment option and proceed to the checkout.

Step 5: Your Amazfit T-Rex 3 will be sent to your address once your order has been placed, and you will receive a confirmation.

Also Read | Noise NoiseFit Crew Pro Bluetooth Calling Smartwatch Review: Ideal Feature-Packed Daily Wear

Price In India

The Amazfit T-Rex 3 is priced at Rs. 19,999 in India. The price in India is lower than its global price of $279.99 (approx. Rs. 23,515) or €299.90 (approx. Rs. 27,820). The smartwatch comes in Onyx color. Pre-orders are available starting September 18, 2024, on Amazon.

For the tech geeks, stay updated with the latest cutting-edge gadgets in the market, exclusive tech updates, gadget reviews, and more right on your phone’s screen. Join Giznext’s WhatsApp channel and receive the industry-first tech updates.

Categories
Apps Featured How To

Instagram Top Hacks: How To Enable or Disable Sensitive Content From Home Feed

Key Highlights

  • Instagram allows sensitive content display on home feed
  • Post frequency can be increased or decreased
  • Settings can be modified via both Android and iOS app

Instagram is a rapidly advancing social media platform which gets a prefference from both general audience as well as content creators. If you scroll through Instagram feed, you generally get the reels, photos from the accounts you follow. However. Instagram also shows you posts based on your activities and interests. Selecting preferred content type that shows up on your feed based on your interests can be done at any given point of time. But despite selecting the preferred content type, you might come across sensitive content on your feed.

The frequency can vary depending on your interest in watching any sensitive pic or video on Instagram. You might get more sensitive content if your frequently consume such content or visit profiles that boast the same content. However, if you wish Instagram to stop pushing sensitive content to your home feed then we can help you with the same. The steps to enable or disable sensitive content on Instagram are listed below:

For the tech geeks, stay updated with the latest cutting-edge gadgets in the market, exclusive tech updates, gadget reviews, and more right on your phone’s screen. Join Giznext’s WhatsApp channel and receive the industry-first tech update.

Also Read: Google Messages Photomoji: What Is It? How To Use?

Instagram Sensitive Content Control: How To Enable Or Disable?

Step 1: Open Instagram Android or iOS mobile app

Step 2: Click on the profile picture icon that you can locate on the bottom right corner

Step 3: Tap on the More (three horizontal lines) option

Step 4: Scroll down to the Suggested Content section

Step 5: Select the Sensitive Content Menu

Step 6: Select Less or More or Standard option as per your preference.

Step 7: Click Confirm to save the settings.

Categories
Apps Featured How To

Instagram AI Tips And Tricks: How To Create And Share AI-Generated Stickers For Stories Chats

Key Highlights

  • Instagram now has AI tools for messaging and media sharing
  • AI stickers can be shared as messages during chats
  • AI-generated stickers can be uploaded via Stories

Instagram has been making its platform all-advanced for the masses and has definitely taken up the top spot in the social media space. Ever since Meta took over the photo-sharing app, the platform has improved exponentially in terms of features. And since this is an AI era, how can Instagram be left behind. Meta has added a whole lot of AI-features to Instagram which can be accessed in DMs/ chats, stories, and posts.

One such features that Instagram has released for the masses is the option to send a AI-generated stickers to any chat. In addition to sharing the Instagram messages, AI-generative stickers can also be uploaded as stories. This creates a whole new experience while using Instagram for messaging or sharing posts. If you are also trying to level-up for messaging and content uploading game with Instagram, do check out the steps with which you can send AI stickers in chat or add them to story.

For the tech geeks, stay updated with the latest cutting-edge gadgets in the market, exclusive tech updates, gadget reviews, and more right on your phone’s screen. Join Giznext’s WhatsApp channel and receive the industry-first tech update.

Also Read: Unable To Connect AirPods With MacBook: How To Fix AirPod And MacBook Pairing Issues?

How To Send AI-Generated Stickers To Any Contact In Instagram Chat

Step 1: After launching the Instagram mobile app, go to the DM or the chat section

Step 2: Go to the chat window or type in the user name to whom you wish to send AI stickers

Step 3: You will be able to see a bunch of options right next to the message typing box. From here, tap on the “+” icon.

Step 4: ow, click on the Imagine+ option

Step 5: In the search box, type in the prompt that you wish to create as a sticker

Step 6: You will get the stickers generated by AI as per your prompt.

Step 7: Select the appropriate sticker and tap on the Send option.

Step 8: If you wish to animate the sticker, press and hold it before sending.

Also Read: Update Your Aadhaar Card For Free Before September 14: Here’s How

How To Add AI-Generated Stickers To Instagram Stories

Step 1: Open the Instagram app and click on the ‘Add’ button to create a new post.

Step 2: Tap on the sticker icon from the top before sharing a photo or video as a story

Step 3: Now, click on AI Stickers.

Step 4: Enter the text prompt for the AI sticker

Step 5: Click on the Generate button

Step 6: Once the sticker is created, tap on it to add it to Instagram Story feed

Categories
Apps Featured How To

Google Messages Photomoji: What Is It? How To Use?

Key Highlights

  • Google Messages allows creating custom emojis from phots
  • Feature called photomoji
  • Allows using facial expressions or personal photos to create emojis

Android is one of the most powerful mobile platforms that is being used by almost every major smartphone OEM nowadays. Google has created a massive ecosystem of apps and tools to give the users an ultimate experience with Android devices. You even get AI-enabled features with the new version of Android. Google Messages which is the default messaging app for Android devices has also been updated just like the remaining in-house Google Apps with several advanced features. We earlier shared the tips and tricks to create and share a selfie GIF using Google Messages. This time, we are sharing the steps with which you can create and share a Photomoji using Google Messages. But what exactly is this Photomoji feature and how can you share it with your contacts? Read on the steps below:

Also Read: Unable To Connect AirPods With MacBook: How To Fix AirPod And MacBook Pairing Issues?

What Is Photomoji Feature In Google Messages?

Photomoji is cool messaging feature that you can access using Google Messages apps. This feature essentially lets you create an emoji using your personal photos, facial expressions, or any random object that you have clicked using your phone’s camera.

Do note that the Photomoji feature is available to use in the RCS chat feature of Google Messages which is nothing but the Android version of iMessages. You can use Photomojis as reaction to any message and can be shared in separate tabs to be used later. To use the Photomoji feature on your smartphone, you will need Android 8.0 OS or higher version.

Also Read: Enhance WhatsApp Security: How To Protect IP Address On WhatsApp Calls And Silence Unknown Callers?

Steps To Create Google Photomoji As A Sticker

Step 1: On your Android phone, launch the Google Messages App

Step 2: Go to any conversation or start fresh

Step 3: Click on the message box

Step 4: Select Emoji icon and then tap on Create

Step 5: Tap on the photo that you want to create as a photomoji reaction from the gallery

Step 6: You can adjust the subject that you wish to use as the reaction

Step 7: Click on Send

Steps To Create And Share Photomoji Reaction Using Google Message

Step 1: Launch Google Messages app

Step 2: Open any conversation and tap and hold the message to which you want to react

Step 3: Now, click Create

Step 4: Select the photo that you want to share as an emoji reaction

Step 5: Hit the Send button.

Categories
Apps Featured How To

Android Cool Tips And Tricks: How To Customize Google Chrome Themes With Generative AI

Key Highlights

  • Google has added AI features to most of its apps and services
  • Google Chrome has also received AI support
  • Aesthetics can be improved with AI customizations in Chrome

Google is actively integrated AI services to its entire range of apps and services which are available in Android. Gemini AI is the Google’s advanced AI-powered assistant helping the masses with a plethora of tasks ranging from research, marketing, and even customer services. Google has been gradually making the AI-features available with the different apps in a bid to improve the overall user experience. Google Chrome which is the dedicated emailing platform has also been updated with AI tools with which the users get a simplified yet advanced emailing services. Customizations with Google Chrome has been one the already available features which now have received AI support. But you can now customize the appearance of Google Chrome using AI. Interested in changing Google Chrome theme with AI? Find out the steps below:

For the tech geeks, stay updated with the latest cutting-edge gadgets in the market, exclusive tech updates, gadget reviews, and more right on your phone’s screen. Join Giznext’s WhatsApp channel and receive the industry-first tech update.

Also Read: Android Tips And Tricks: How To Maximize Battery Health And Reduce Battery Drain

Steps To Create A Customized Google Chrome Theme With Generative AI

As mentioned above, creating a personalized Chrome theme is now possible using generative AI. One can create themes by selecting any specific subject, style, or mood.

Step 1: Power on your laptop/ PC and open Google Chrome web browser.

Step 2: Launch a new home page on Google Chrome.

Step 3: Once the new tab page is open, look at the bottom right for “Customize Chome” option. Tap on it.

Step 4: Now, you’ll see the Change theme option. Click on it.

Step 5: Select the Create themes with AI option.

Step 6: You will now need to feed in the requirements in the “Add optional details”. In this menu you will get “Select a style”, “Select a mood”, and “Select a color” options. Fill the apt details.

Step 7: If you wish to use any specific color theme, tap on the “custom color” option,

Step 8: Tap on the Create your AI theme option

Step 9: Choose the theme to apply it to a new page. It is worth noting that up to 10 seconds can be taken for the entire customizations to be applied.

Categories
Featured How To

Tired Of Unwanted Ads And Pop-Ups On Google Chrome? How To Remove

Key Highlights

  • Unwanted ads and pop-ups hampers user experience on Chrome
  • Pop-ups and malware can keep coming back
  • Changing default ad-settings can help blocking pop-up and malware

Google Chrome has become the preferred web browsers taking on some of the most popular counterparts such as Microsoft Edge, Opera, and others. Google has been working on to improve Gmail’s services making it compatible with various OS and gadgets. For instance, Gmail’s dedicated app is available for mobile devices including both Android and iOS smartphones and tablets. The desktop version is also available and getting advanced with the addition of new features.

While Chrome is undeniably one of the most powerful web browsers out there in the market, it isn’t free of pop-ups and unwanted softwares. At times, these non-stop pop-ups showing up on the screen can be annoying. Specifically, with no direct way of disabling them. You might be surprised to know that these unwanted ads or pop-ups could be due to a malicious software that is downloaded on your device leaving your safety and privacy at risk. What can you do to get rid of unwanted ads and pop-ups flooding Google Chrome? The steps are below:

Also Read: Enhance WhatsApp Security: How To Protect IP Address On WhatsApp Calls And Silence Unknown Callers?

How To Know If Any Unwanted Software Or Malware On Your Computer

If there is any unwanted software or malware has got accidentally installed on your computer, you will see the following issues.

  1. Pop-ups will show up along with new tabs that don’t go away easily
  2. You will see the Chrome homepage or search engine changing without permissions
  3. If there are unwanted Chrome extensions or toolbars that don’t go away easily
  4. You get constant alerts about virus or malware on your device

Also Read: Android Tips And Tricks: How To Create Your Selfie GIF And Send Via Google Messages

Steps To Block Unwanted Apps And Malware On Google Chrome

In order to block the unwanted ads and pop-ups on your computer, you can make modifications to the default ad settings and permissions. By doing so, you will get a better control on the ads and your privacy will be enhanced while you browse the web.

Step 1: After powering on your laptop or PC, launch the Google Chrome web browser

Step 2: From the home page, tap on the More (three vertical dots) icon. You can locate it on the top right of the Chrome’s home page.

Step 3: Tap on the Privacy and Security option

Step 4: Click on the Site Settings menu

Step 5: Now, tap on the Additional content settings option.

Step 6: Click “Intrusive ads” setting

Step 7: Now, select the “Ads are blocked on sites known to show intrusive or misleading ads” as default setting.

By setting this up, you will be able to successfully block the unwanted ads and annoying pop-ups on Chrome.

Categories
Featured How To Info

Update Your Aadhaar Card For Free Before September 14: Here’s How

Key Highlights

  • Update Aadhaar every 10 years to ensure accuracy
  • Free updates available until September 14, 2024
  • Simple updates can be done online

Aadhaar card is more than just an ID. It is an important document for every Indian citizen. Issued by the Unique Identification Authority of India (UIDAI), this 12-digit number serves as proof of identity and address. Also, it is essential for many everyday tasks, such as, filing taxes, school/college admissions. With its importance so widespread, keeping your Aadhaar card up-to-date is now crucial.

Also Read | How To Change Your Aadhaar Card Photo: A Step-by-Step Guide

Why You Should Update Your Aadhaar Card

The govt. suggests that Aadhaar cardholders update their information every 10 years. This recommendation ensures that all your details, like your name or address, are accurate. Keeping these details up-to-date is important for a few reasons:

  • Govt. services, such as subsidies and welfare benefits, reach the right people without unnecessary delays.
  • Regular updates minimize the risk of someone else misusing your Aadhaar information for fraudulent purposes.
  • Whether for travel, education, or other services, having correct Aadhaar details ensures smooth and hassle-free verification.

Free Aadhaar Update Until September 14, 2024

Right now, UIDAI is offering free updates to your Aadhaar card, but only until September 14, 2024. This offer has already been extended multiple times, and there’s no guarantee it will be extended again. Normally, updating your Aadhaar card would cost you Rs. 50, so this is a great opportunity to make sure your information is current without paying any price.

How To Update Your Aadhaar Card Online

Updating your Aadhaar details online is easy and can be done in just a few steps:

Step 1: Go to the UIDAI Portal.

Step 2: Enter your Aadhaar number and the OTP sent to your registered mobile number.

Step 3: Review the details like your address displayed on the portal. If everything is correct, you don’t need to update anything.

Step 4: If you spot any errors, choose the document you will use for verification. Then, upload a scanned copy of that document. Make sure the file is less than 2MB in size and is in JPEG, PNG, or PDF format.

Step 5: Once you have submitted your updates, you will get a Service Request Number (SRN). Use this to keep track of the update process.

Also Read | Need To Lock And Unlock Your Aadhaar Card Biometrics? Here’s How To Do It

What Can’t Be Updated Online?

Not everything can be updated through the online portal. If you need to change your name, mobile number, or photograph, you will need to visit a UIDAI-authorised centre. These updates require biometric verification, which cannot be done online.

For the tech geeks, stay updated with the latest cutting-edge gadgets in the market, exclusive tech updates, gadget reviews, and more right on your phone’s screen. Join Giznext’s WhatsApp channel and receive the industry-first tech updates.

Categories
Apps Featured How To

Android Tips And Tricks: How To Create Your Selfie GIF And Send Via Google Messages

Key Highlights

  • Google Messages can be used to send multimedia messages
  • One can also create a selfie GIF on Google Messages
  • Option available with newer version of Android

Android is currently the most powerful OS which is driving modern-age smartphones and tablets. Each year, Google releases a new version of Android with several enhancements and upgrades so that masses get the best experience with its usage. Over the years, all the Google apps and tools have got advanced with the latest technologies allowing for a refined user experience overall. With the Android OS, calling and messaging experience is also taken to whole new level. You now don’t have to solely rely on your mobile networks for calling/ SMS. Rather this can be done if you have an active internet connection on your device.

Also, sending multimedia messages has become easier than ever with Google-powered devices. You don’t need a third party app to share photos or videos with your friends or families. The same can be done using the standard Google Messages app. Yes, you read that right. The option to send multimedia messages including pics and short videos can be accessed on Google Messages. And to make messaging more fun, Google Messages also let you create a GIF of your selfie which you can later share with any contact. Interested in knowing the steps? Read on below:

For the tech geeks, stay updated with the latest cutting-edge gadgets in the market, exclusive tech updates, gadget reviews, and more right on your phone’s screen. Join Giznext’s WhatsApp channel and receive the industry-first tech update.

Also Read: YouTube Music To Apple Music: Here’s How To Transfer Your Playlists With Ease

Steps To Create And Share Selfie GIF Using Google Messages

Step 1: Unlock your smartphone from which you wish to send your selfie as a GIF

Step 2: Go to the Google Messages app and open it

Step 3: Start a new conversation or open the conversation window where you want to send the selfie GIF

Step 4: In the message compose box, you’ll see a bunch of options including the camera. Tap on it. It’s worth adding that this feature will be available with the newer Android versions.

Step 5: Tap and hold the Camera icon placed next to the message type box.

Step 6: You will see a countdown window which essentially will be the buffer for you to get prepared for the selfie.

Step 7: The selfie video will be recorded automatically.

Step 8: Once the GIF is captured, simply tap on the Send icon to share the selfie GIF with the contact.

It’s worth adding that these selfies captured in the Google Messages can’t be edited. Instead, you’ll need to tap on the Restart button for the new recording. Furthermore, the selfie GIF that is recorded by the Google Messages has only 3 seconds of duration. The GIFs will be saved on the device’s camera roll which you can access later from the Photos or gallery app.