Key Highlights
- iOS has a simple built-in screen recording tool
- There’s a simple shortcut that needs to be known before adding a VoiceOver to a screen recording
- You can add the Screen Recording button in the Control Centre
Screen recording is a handy tool whenever you need to capture something on your iPhone for later sharing or research. There are times when a person may merely want to know how an iPhone feature or setting operates. The screen can then be recorded so that a video of how it truly operates can be shown. But at times, that’s also insufficient.
iOS has a simple screen recording tool built in. In this post, we will show you how to use this tool to make sure you’re capturing only the sounds you want. There is a simple shortcut that must be learned before adding VoiceOver to a screen recording or performing a basic recording. The Control Center button for screen recording can be added. Simply navigate to Settings and select Control Center to add that. The Control Center will now have a Screen Recording button if you select it. Also Read | iOS 17 Live Voicemail: How To Use It On Your iPhone
Steps To Add A Voiceover To Your iPhone’s Screen Recordings

Step 1: From the top-right corner of the iPhone screen, swipe down diagonally.
Step 2: Simply click the screen recording option if you only need to record your screen.
Also Read | iOS 17 Hands-On: Set Up Standby Mode On Your iPhone? Here’s How
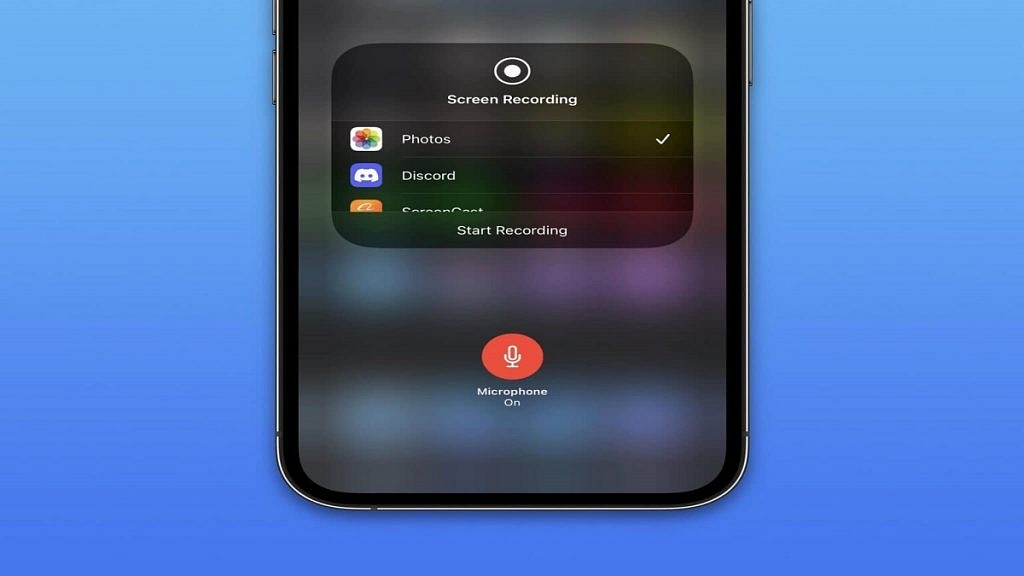
Step 3: Simply long-press the Screen Recording icon to add a VoiceOver.

Step 4: Now a button for a microphone will show up. When you tap it, it becomes red and says “Microphone on.”
Step 5: After that, choose the app you wish to save the recording to from the selection of apps that will now appear.
Step 6: Start recording and you are all done. A VoiceOver will be added to your screen recording.
Also Read | Gboard On iOS: How To Download And Install Gboard Keyboard App On iPhone, iPad
